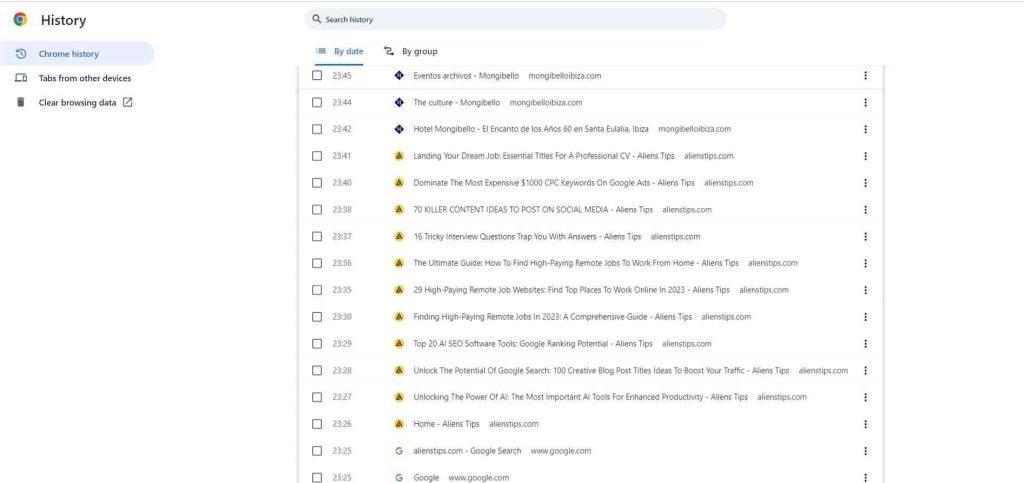
Here are the instructions to Take a Screenshot on Mobile and PC, such as a browser history page, with today’s date visible for proof:


instructions to Screenshot on Mobile and PC:
Mobile:
Android:
- Navigate to the screen you want to capture.
- Simultaneously press the power button and volume down button and hold them for a moment.
- You should see a flash or hear a sound indicating the screenshot has been taken.
- Find the screenshot in your device’s photo gallery.
iOS (iPhone/iPad):
- Go to the screen you wish to capture.
- On iPhones without a home button, simultaneously press the side button and volume up button and hold them for a moment. On iPhones with a home button, press the home button and the side button simultaneously.
- You’ll see a flash, and the screenshot preview will appear briefly.
- Access the screenshot from your device’s photo gallery.
PC (Windows):
- Navigate to the screen you want to capture.
- Press the “Print Screen” key (labeled “PrtScn” or similar) to capture the entire screen.
- Open an image editing program like Paint or Photoshop.
- Paste the screenshot (Ctrl + V) into the program.
- Save the file in your desired location.
PC (Mac):
- Go to the screen you want to capture.
- For a full-screen screenshot, press Command (⌘) + Shift + 3.
- For a selected portion, press Command (⌘) + Shift + 4, then drag to select the area you want to capture.
- The screenshot will be saved on your desktop by default.
These straightforward steps will help you Take a Screenshot on Mobile and PC devices effortlessly.
Step-by-Step Instructions
- Open the Browser: Launch your web browser (e.g., Google Chrome, Mozilla Firefox, Safari).
- Navigate to History: Go to the history page by either:
- Clicking on the menu icon (usually three dots or lines) in the top-right corner of the browser window, then selecting “History” from the dropdown menu.
- Using the keyboard shortcut:
- On Windows: Press Ctrl + H.
- On macOS: Press Cmd + Y.
- Arrange by Date: Ensure that your browsing history is arranged by date so that today’s date appears at the top or near the top of the list. You may need to select “Date” or “Today” to sort the history accordingly.
- Maximize the Window: Maximize your browser window to ensure that as much of the history list is visible as possible.
- Capture the Screenshot: To capture the entire history page along with today’s date:
- On Windows:
- Press the “PrtScn” (Print Screen) key on your keyboard. This captures the entire screen.
- Open an image editor or word processing program (e.g., Paint, Word).
- Paste the screenshot into the program by pressing Ctrl + V.
- Save the image.
- On macOS:
- Press Shift + Command + 4 keys together.
- Press the Spacebar. The cursor will change to a camera icon.
- Click on the browser window to capture the entire window.
- The screenshot will be saved on your desktop by default.
- On Windows:
- Check the Screenshot: Open the saved screenshot to ensure that the entire history page, including today’s date, is clearly visible.
- Share or Store the Screenshot: Depending on your purpose, you can share the screenshot with others as proof or store it for your records.
By following these steps, you should be able to capture a screenshot of your browser history page with today’s date visible for proof.

Here are instructions for taking a screenshot on a mobile device:
For Android:
- Navigate to the history page you want to capture.
- Depending on your device model, you can usually take a screenshot by pressing the power button and the volume down button simultaneously and holding them for a couple of seconds. Or, some devices may support alternative methods like swiping your palm across the screen from right to left (or left to right) to capture a screenshot.
- After capturing the screenshot, you should see a preview of it. You may have the option to edit or annotate the screenshot before saving it.
- Save the screenshot to your device’s photo gallery or camera roll.
- Make sure the date is visible on the screenshot to serve as proof.
For iOS (iPhone/iPad):
- Navigate to the history page you want to capture.
- On iPhones without a home button (iPhone X and later), simultaneously press the side button (on the right side) and the volume up button and hold them for a couple of seconds. On iPhones with a home button, simultaneously press the home button and the side button (on the right side) and hold them for a couple of seconds.
- After capturing the screenshot, you should see a preview of it. You may have the option to edit or annotate the screenshot before saving it.
- Save the screenshot to your device’s photo gallery.
- Make sure the date is visible on the screenshot to serve as proof.
Once you’ve taken the screenshot, you can refer to it as proof of the history page with today’s date. If you need further assistance, feel free to ask!

